Formik and Yup - field validations
July 14, 2020
Creating a form can be really simple. However, form validation can cause headaches and may result in stress. During the creation of my website I tossed around a few options regarding how I was going to create forms on my website - from what fields to use to styling to field validations. I wanted to use something that would be easy to use, set up and modify in the future. I settled on Formik and Yup.
Formik is a library that helps you to get values in and out of form states, handle form submissions as well as validation and error messages.
Yup is a JavaScript schema builder for value parsing and validation.
Yup allows you to create a schema of what you are expecting and then validates that the value you get matches that schema. Yup allows for client-side validation. Used along with formik it provides a very powerful and easy to use tool to enhance form validation and provide user friendly error messages.
Let me show you how to create a form and validate it with yup and formik. The first thing to do is to install yup and formik.
npm install formik --savenpm install yup --saveThen you are going to create your form component and import them
import React from "react";
import { Formik, Form, Field } from "formik";
import * as Yup from "yup";
The next thing that we are going to do is to create our schema validation. We are going to have two fields - name and email.
const subscriptionSchema = Yup.object().shape({
   fullName: Yup.string()
       .required("Required")
       .min(6, 'FullName must contain at least 6 characters'),
   email: Yup.string()
       .email("Enter a valid email")
       .required("Email is required"),
});
Let’s break down what is happening above. In the schema that we have created we are defining two values: name and email. Further we are
defining their type Yup.string(). You can use Yup.number(), Yup.date() etc. You can find more by checking out the Yup documentation.
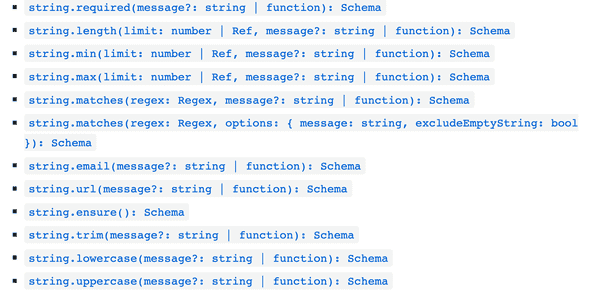
We then specify the things that we are checking for such as it being required, having an email format or having a minimum value. There is
a wide variety of things that you can stipulate that must be met.
As shown in the above image all of these have different parameters that you can use to do things such as display a message that will be shown if the user does not enter anything or if it doesn’t meet the min or max limit or if it is not a valid email.
Let us now create our form.
const subscribeForm = () => (
    <div>
        <h1>Signup</h1>
        <Formik
            initialValues={{
                fullName: '',
                email: '',
            }}
            validationSchema={subscriptionSchema}
            onSubmit={values => {
                // same shape as initial values
                console.log(values);
            }}
        >
            {({ errors, touched }) => (
                <Form>
                    <label>FullName</label>
                    <Field name="fullName" />
                    {errors.fullName && touched.fullName ? (
                        <div style={{
                            color: 'red'
                        }}>{errors.fullName}</div>
                    ) : null}
                    <label>Email</label>
                    <Field name="email" type="email" />
                    {errors.email && touched.email ? <div style={{
                        color: 'red'
                    }}>{errors.email}</div> : null}
                    <button type="submit">Submit</button>
                </Form>
            )}
        </Formik>
    </div>
);

export default subscribeForm
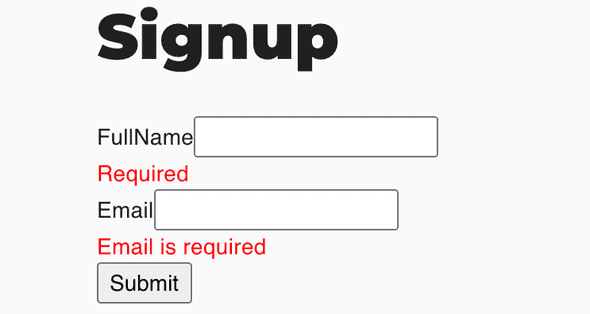
Your form should look like this

When a user clicks submit without entering anything the form throws the appropriate errors

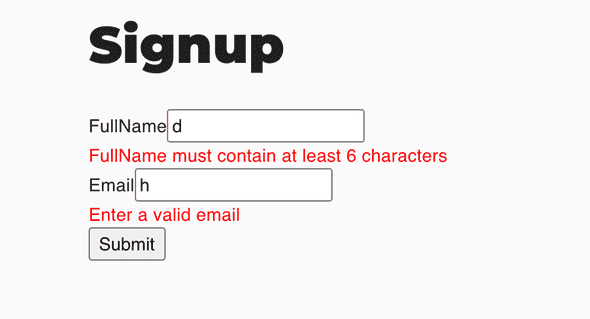
When a user does not meet the min characters or the email entered is not valid then they will see the appropriate errors

I strongly recommend that you check out the documentation for Formik and Yup especially the Formik Tutorials as they provide valuable information to expand on what I have shown you.
I hope that this article provides you with a great kickstart to validating your React forms with Formik and Yup.
Take a look at the Youtube video Tutorial for this blog post to learn more.
You can check out my blog on Connecting Your Custom Form To Hubspot to learn more about form submission and collecting subscribers or contacts.

