

Hubspot is a great tool that offers a full platform of marketing, sales, customer service, and CRM software --- plus the methodology, resources, and support --- to help businesses grow and engage with their customers.
A feature of theirs that I have been using is their form to get subscribers for my newsletter as well as to have persons contact me. Initially I used their form script and added it to my website. However, it did not match the design and flow that I was going for.
I then decided to create a custom form in my gatsby blog and connect it to hubspot.

Follow these steps to implement subscription management in your Gatsby Blog by connecting a custom React form to hubspot.
-
Create a free hubspot account.

-
After signing up navigate to Marketing > Forms.
-
In the upper right, click Create form.
-
Choose form Type as Embedded Form
-
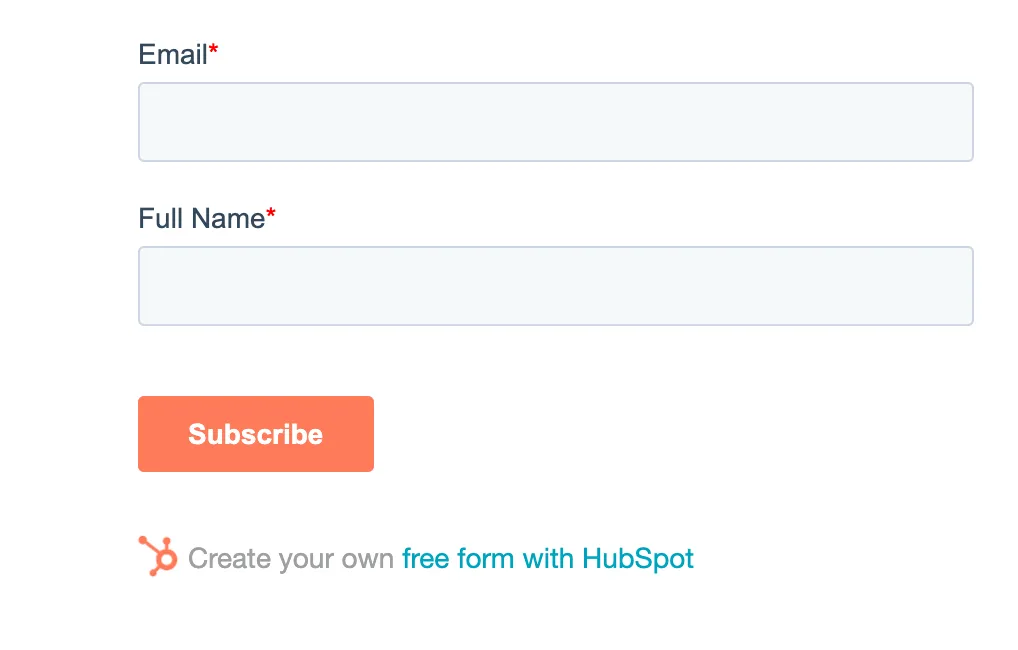
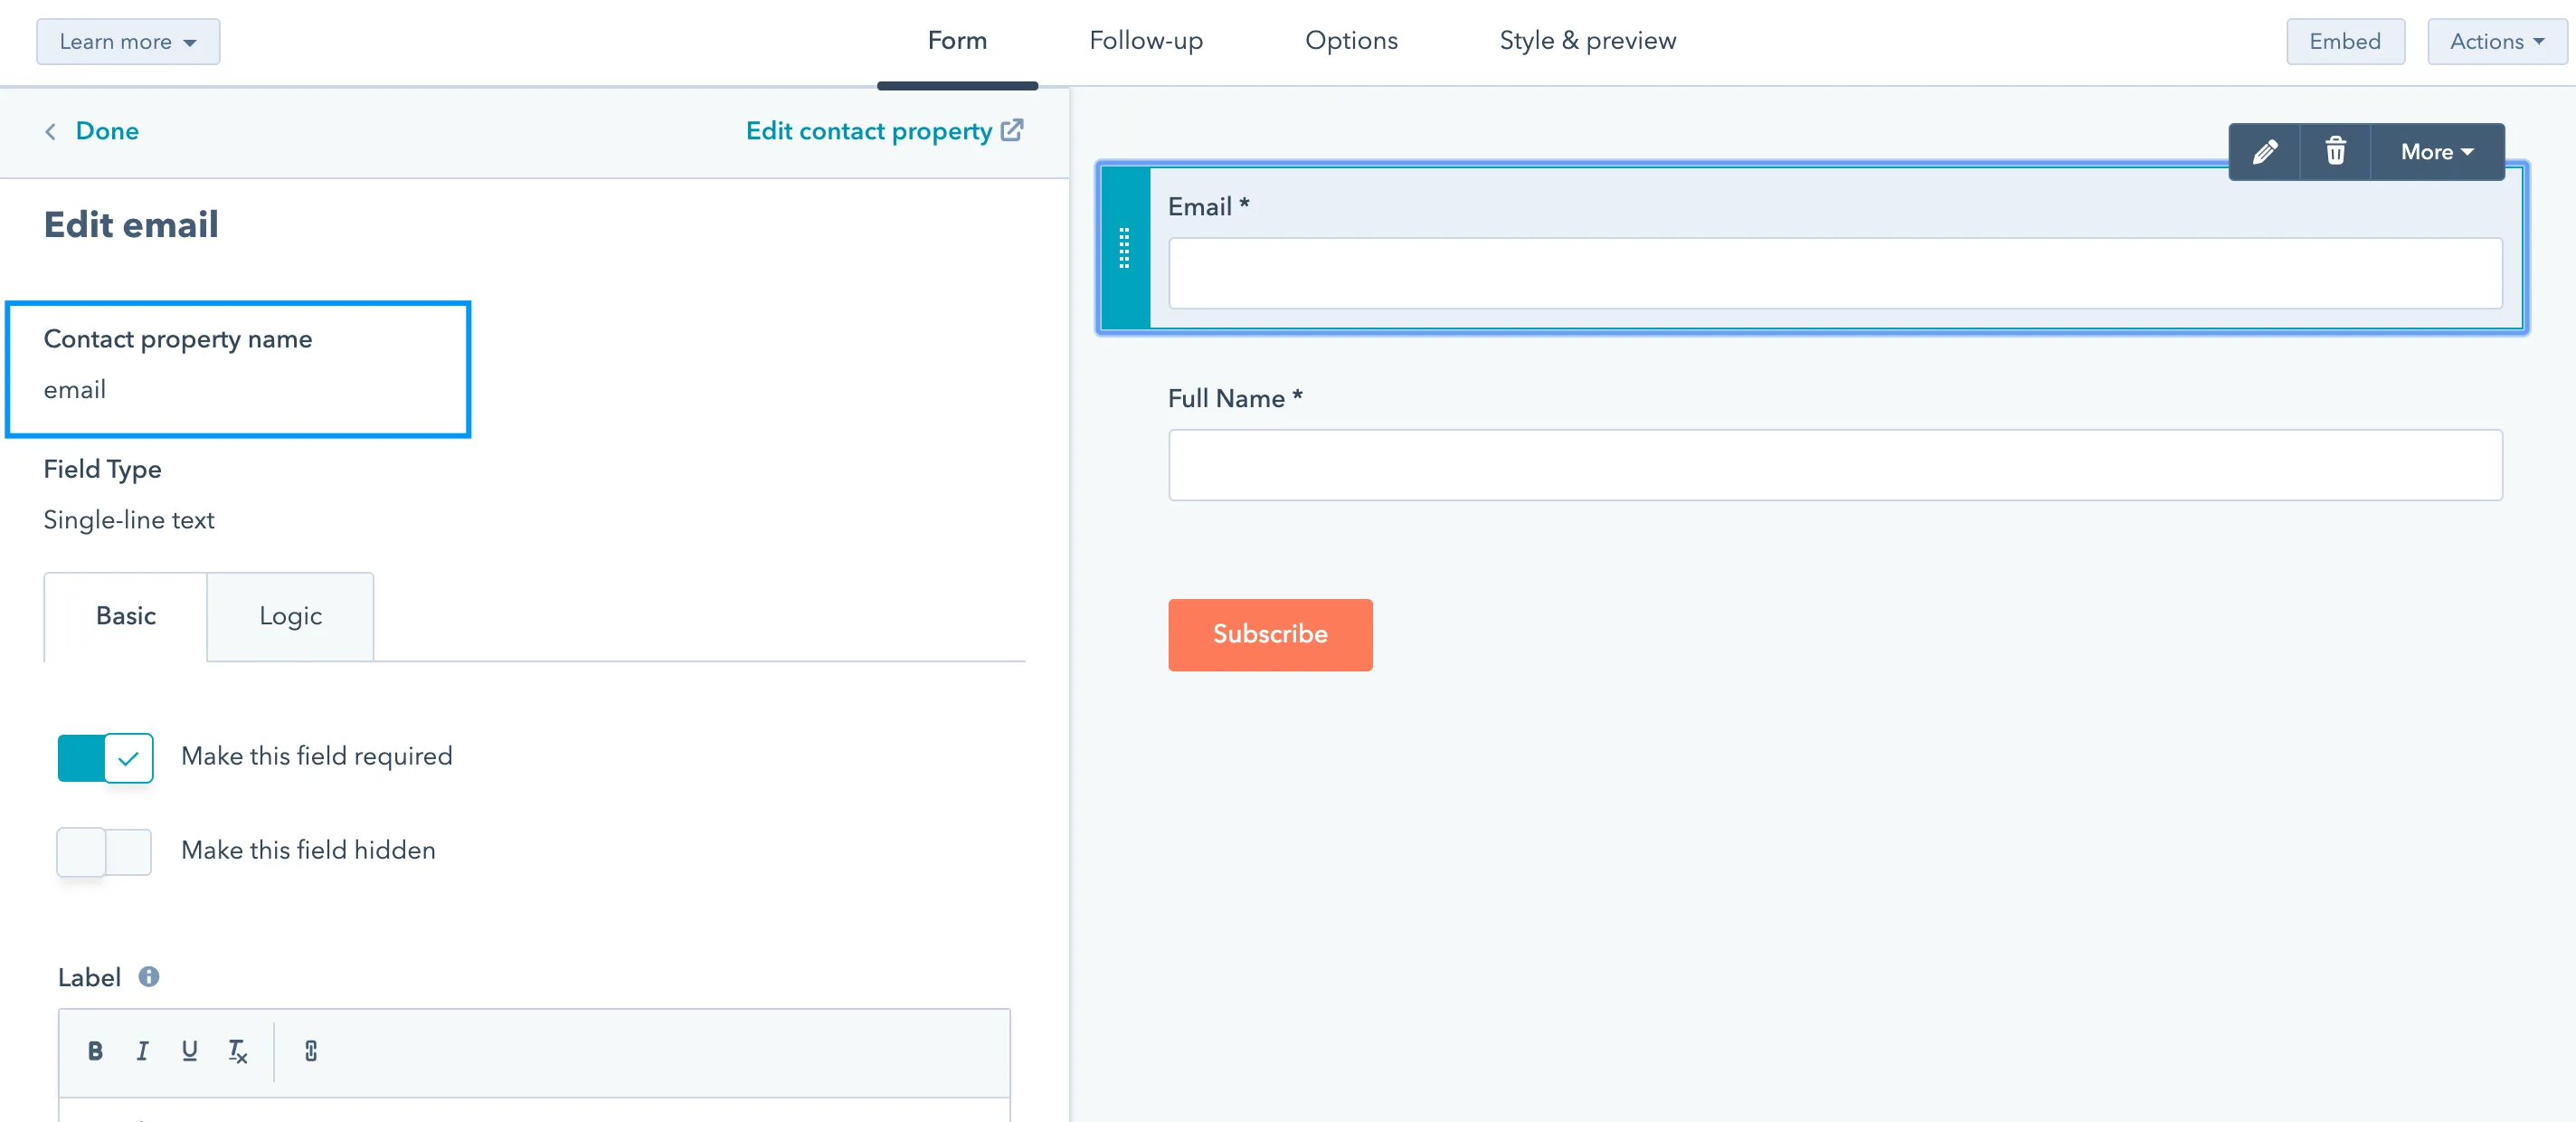
Enter the form details that you want ensuring that you take note of the contact property.
-
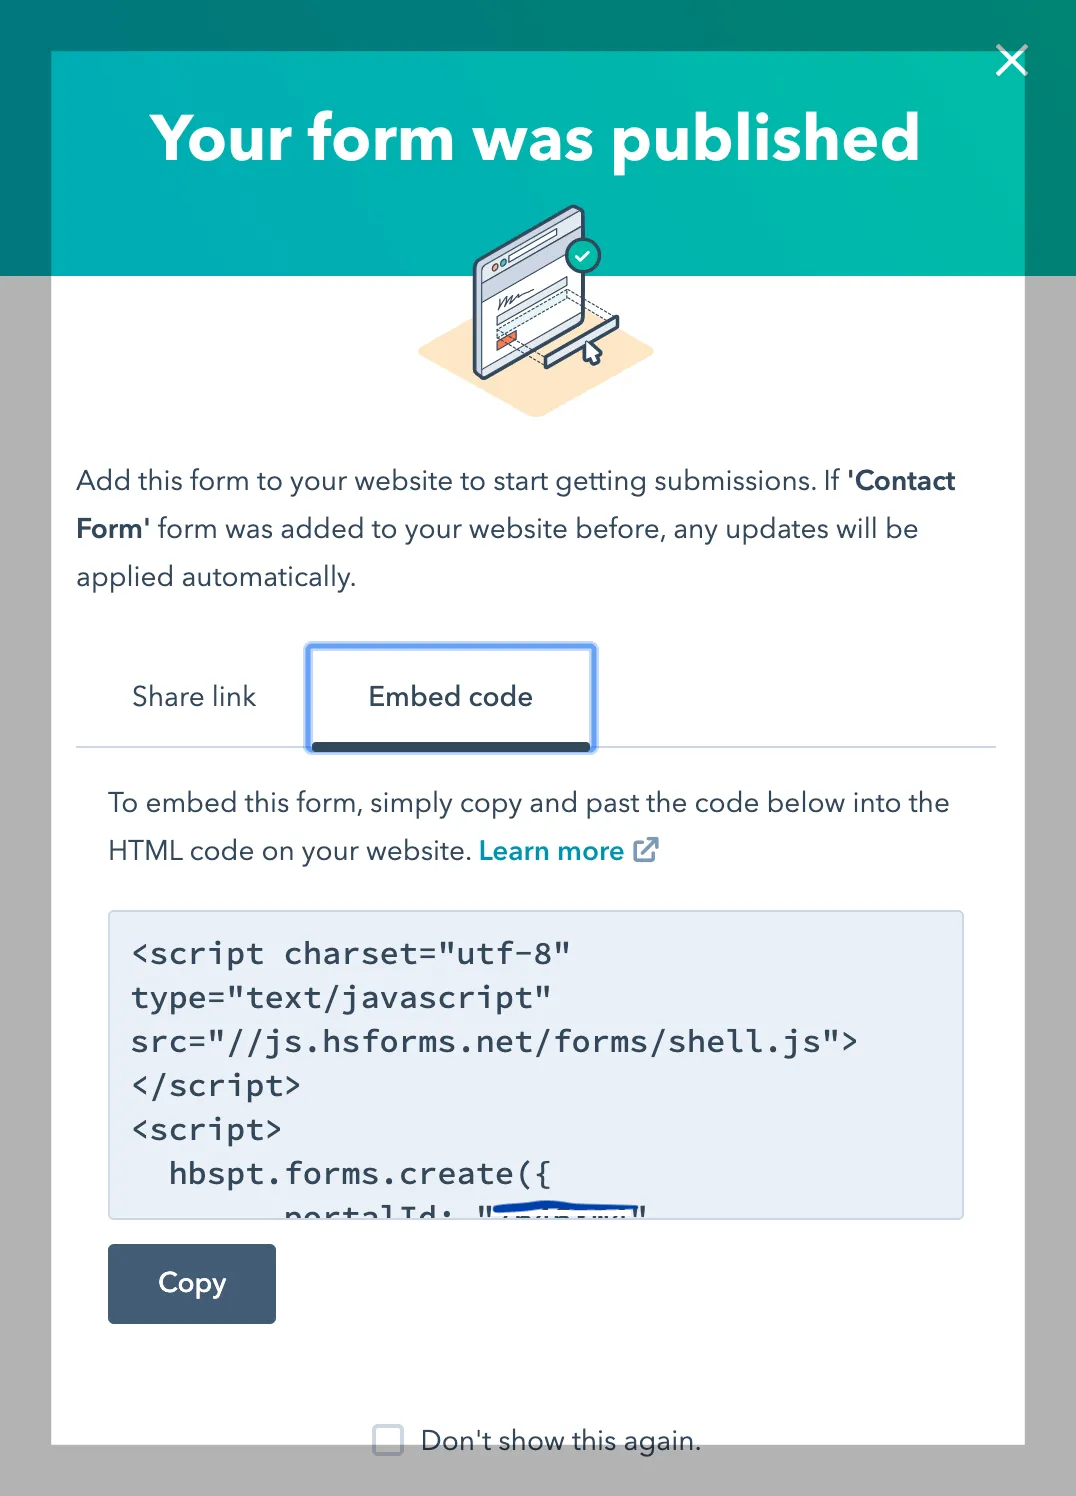
After entering the fields that you want click Publish
-
You should then see a popup
-
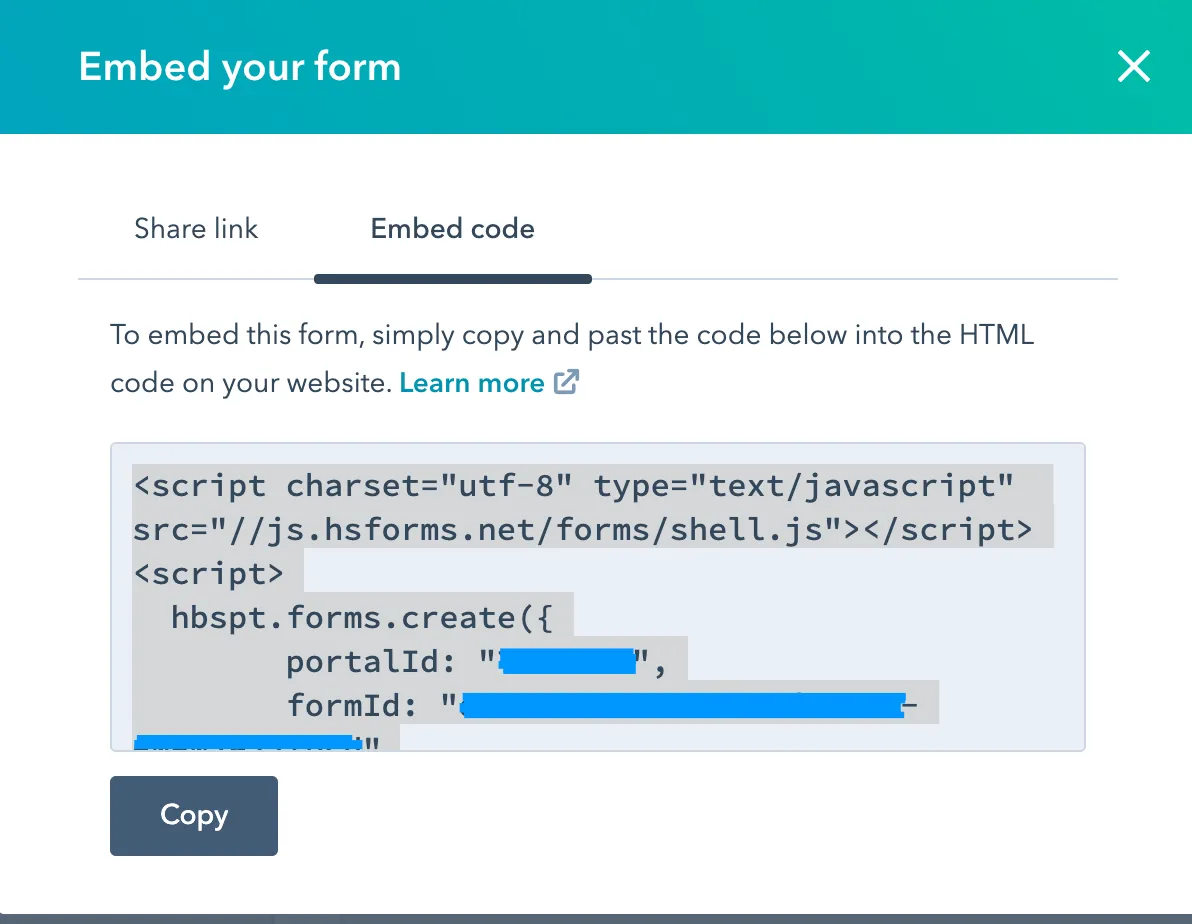
Click on Embed Code and make note of the portalId and formId
The next thing I did was to create a form component. This is where I would get the data I need and send it over.
import React, { useState } from "react";

const Subscribe = () => {
    const [name, setName] = useState("");
    const [email, setEmail] = useState("");

    return (
        <form onSubmit={handleSubmit}>
            <h4>
                Subscribe To Newsletter
            </h4>
            <label>
                Full Name:
                <input
                    type="text"
                    value={name}
                    onChange={e => setName(e.target.value)}
                />
            </label>
            <label>
                Email
                <input
                    type="text"
                    value={email}
                    onChange={e => setEmail(e.target.value)}
                />
            </label>
        </form>
    )
}

export default Subscribe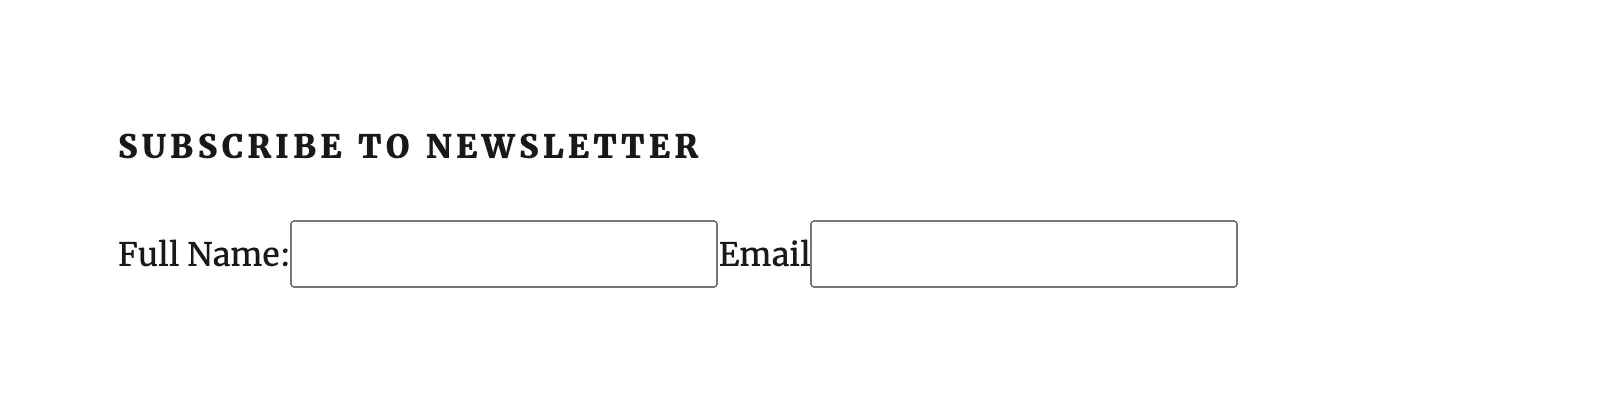
You can add any styling you want as well a field validations. I used Material UI as well as Formik and Yup to style and validate my form. You can check out my tutorial on Using Formik and Yup to perform field validations
I then created a handleSubmit function that would take the values submitted and JSON body for the POST request that I would send to hubspot. You can check out their developer documentation to learn about the various form submission data that they accept.
Remember when I told you to make note of the contact property, portalId and formId? You will use them in the request that is sent over to hubspot. In creating the url you will use the format https://api.hsforms.com/submissions/v3/integration/submit/PORTAL-ID/FORM-ID. In creating the JSON body to be sent over it will be in the form of
"fields": [
                {
                    "name": <contact property>,
                    "value": <value recieved from form>
                },
                {
                    "name": <contact property>,
                    "value": <value recieved from form>
                }
            ],
If the contact property does not match what is on the form you created then the submission will not be successful.
To send the post request over I used an XMLHttpRequest. You can use other methods of making an http request such as Axios.
const handleSubmit = (evt) => {

        evt.preventDefault();
        var xhr = new XMLHttpRequest();
        var url = 'https://api.hsforms.com/submissions/v3/integration/submit/PORTAL-ID/FORM-ID'
        var data = {
            "fields": [
                {
                    "name": "email",
                    "value": email
                },
                {
                    "name": "firstname",
                    "value": name
                }
            ],
            "context": {
                "pageUri": "www.juliapottinger.com",
                "pageName": "Julia Pottinger"
            },
        }

        var final_data = JSON.stringify(data)

        xhr.open('POST', url);
        // Sets the value of the 'Content-Type' HTTP request headers to 'application/json'
        xhr.setRequestHeader('Content-Type', 'application/json');
        xhr.onreadystatechange = function () {
            if (xhr.readyState === 4 && xhr.status === 200) {
                alert(xhr.responseText); // Returns a 200 response if the submission is successful.
            } else if (xhr.readyState === 4 && xhr.status === 403) {
                alert(xhr.responseText); // Returns a 403 error if the portal isn't allowed to post submissions.
            } else if (xhr.readyState === 4 && xhr.status === 404) {
                alert(xhr.responseText); //Returns a 404 error if the formGuid isn't found
            }
        }

        // Sends the request
        xhr.send(final_data)
    }
I applied styling to the form and did a test and it was successful.
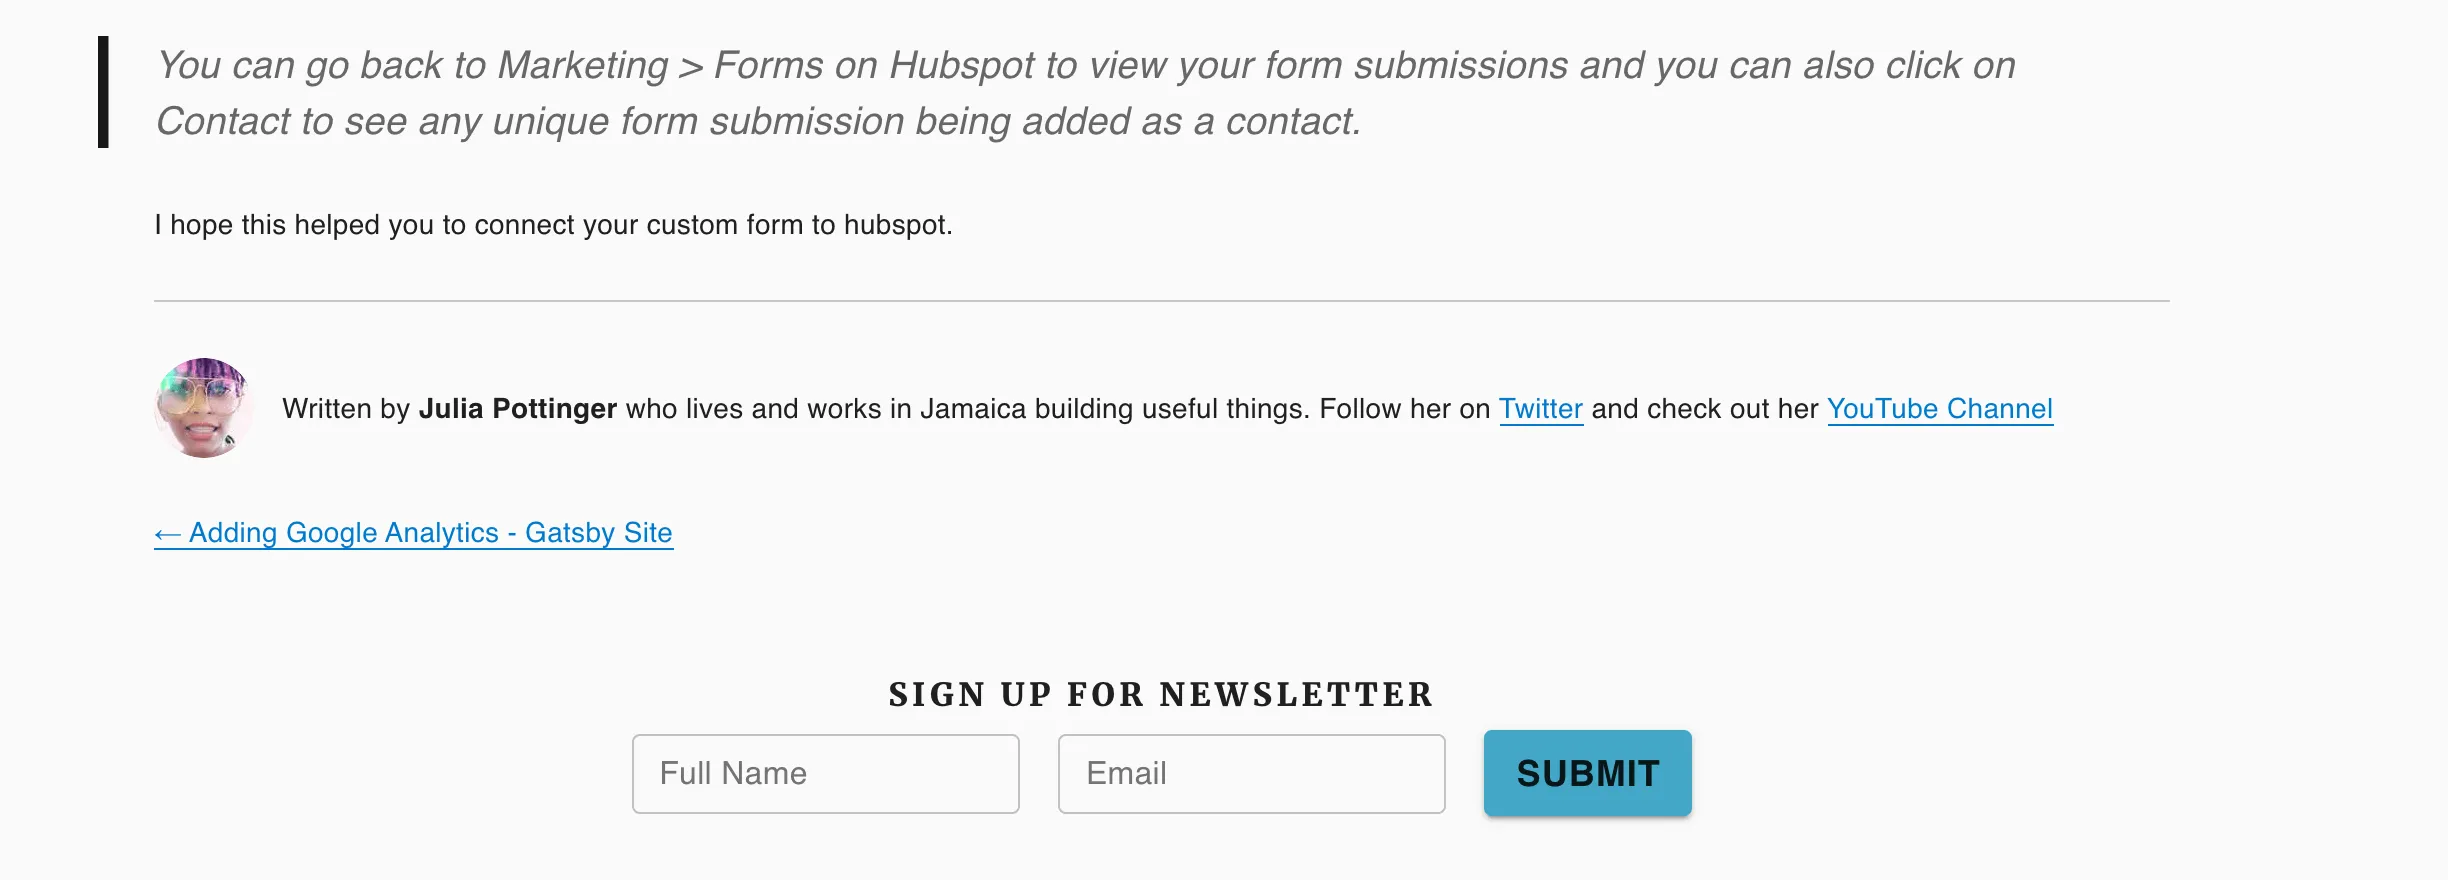
You can go back to Marketing > Forms on Hubspot to view your form submissions and you can also click on Contact to see any unique form submission being added as a contact.
At the end your Subscribe.js component should have the following code
import React, { useState } from "react";

const Subscribe = () => {
    const [name, setName] = useState("");
    const [email, setEmail] = useState("");

    const handleSubmit = (evt) => {

        evt.preventDefault();
        var xhr = new XMLHttpRequest();
        var url = 'https://api.hsforms.com/submissions/v3/integration/submit/PORTAL-ID/FORM-ID'
        var data = {
            "fields": [
                {
                    "name": "email",
                    "value": email
                },
                {
                    "name": "firstname",
                    "value": name
                }
            ],
            "context": {
                "pageUri": "www.juliapottinger.com",
                "pageName": "Julia Pottinger"
            },
        }
        console.log(data)
        var final_data = JSON.stringify(data)

        xhr.open('POST', url);
        // Sets the value of the 'Content-Type' HTTP request headers to 'application/json'
        xhr.setRequestHeader('Content-Type', 'application/json');

        xhr.onreadystatechange = function () {
            if (xhr.readyState === 4 && xhr.status === 200) {
                alert(xhr.responseText); // Returns a 200 response if the submission is successful.
            } else if (xhr.readyState === 4 && xhr.status === 403) {
                alert(xhr.responseText); // Returns a 403 error if the portal isn't allowed to post submissions.
            } else if (xhr.readyState === 4 && xhr.status === 404) {
                alert(xhr.responseText); //Returns a 404 error if the formGuid isn't found
            }
        }
        // Sends the request
        xhr.send(final_data)
    }

    return (
        <form onSubmit={handleSubmit}>
            <label>
                Full Name:
                <input
                    type="text"
                    value={name}
                    onChange={e => setName(e.target.value)}
                />
            </label>
            <label>
                Email
                <input
                    type="text"
                    value={email}
                    onChange={e => setEmail(e.target.value)}
                />
            </label>
            <input type="submit" value="Submit" />
        </form>
    );
}

export default Subscribe
I hope this helped you to connect your custom form to hubspot. If you are interested in the styling and error handling aspect of this form then take a look at Using Formik and Yup to perform field validations
Check out the Youtube Tutorial for this blog.

Written by
Julia Pottinger
Hi, I'm Julia. I've been in QA for over a decade. I spend my days testing software and my own time building apps and games, and I write here to share what I learn, the practical, honest lessons you can actually use.
Comments 0
Share your thoughts, ask questions, or add to the conversation.